Keira3 NPC Tutorial
Keira3 requires AzerothCore and a database manager.
Make your own AzerothCore server here
Install Keira3 here
Overview
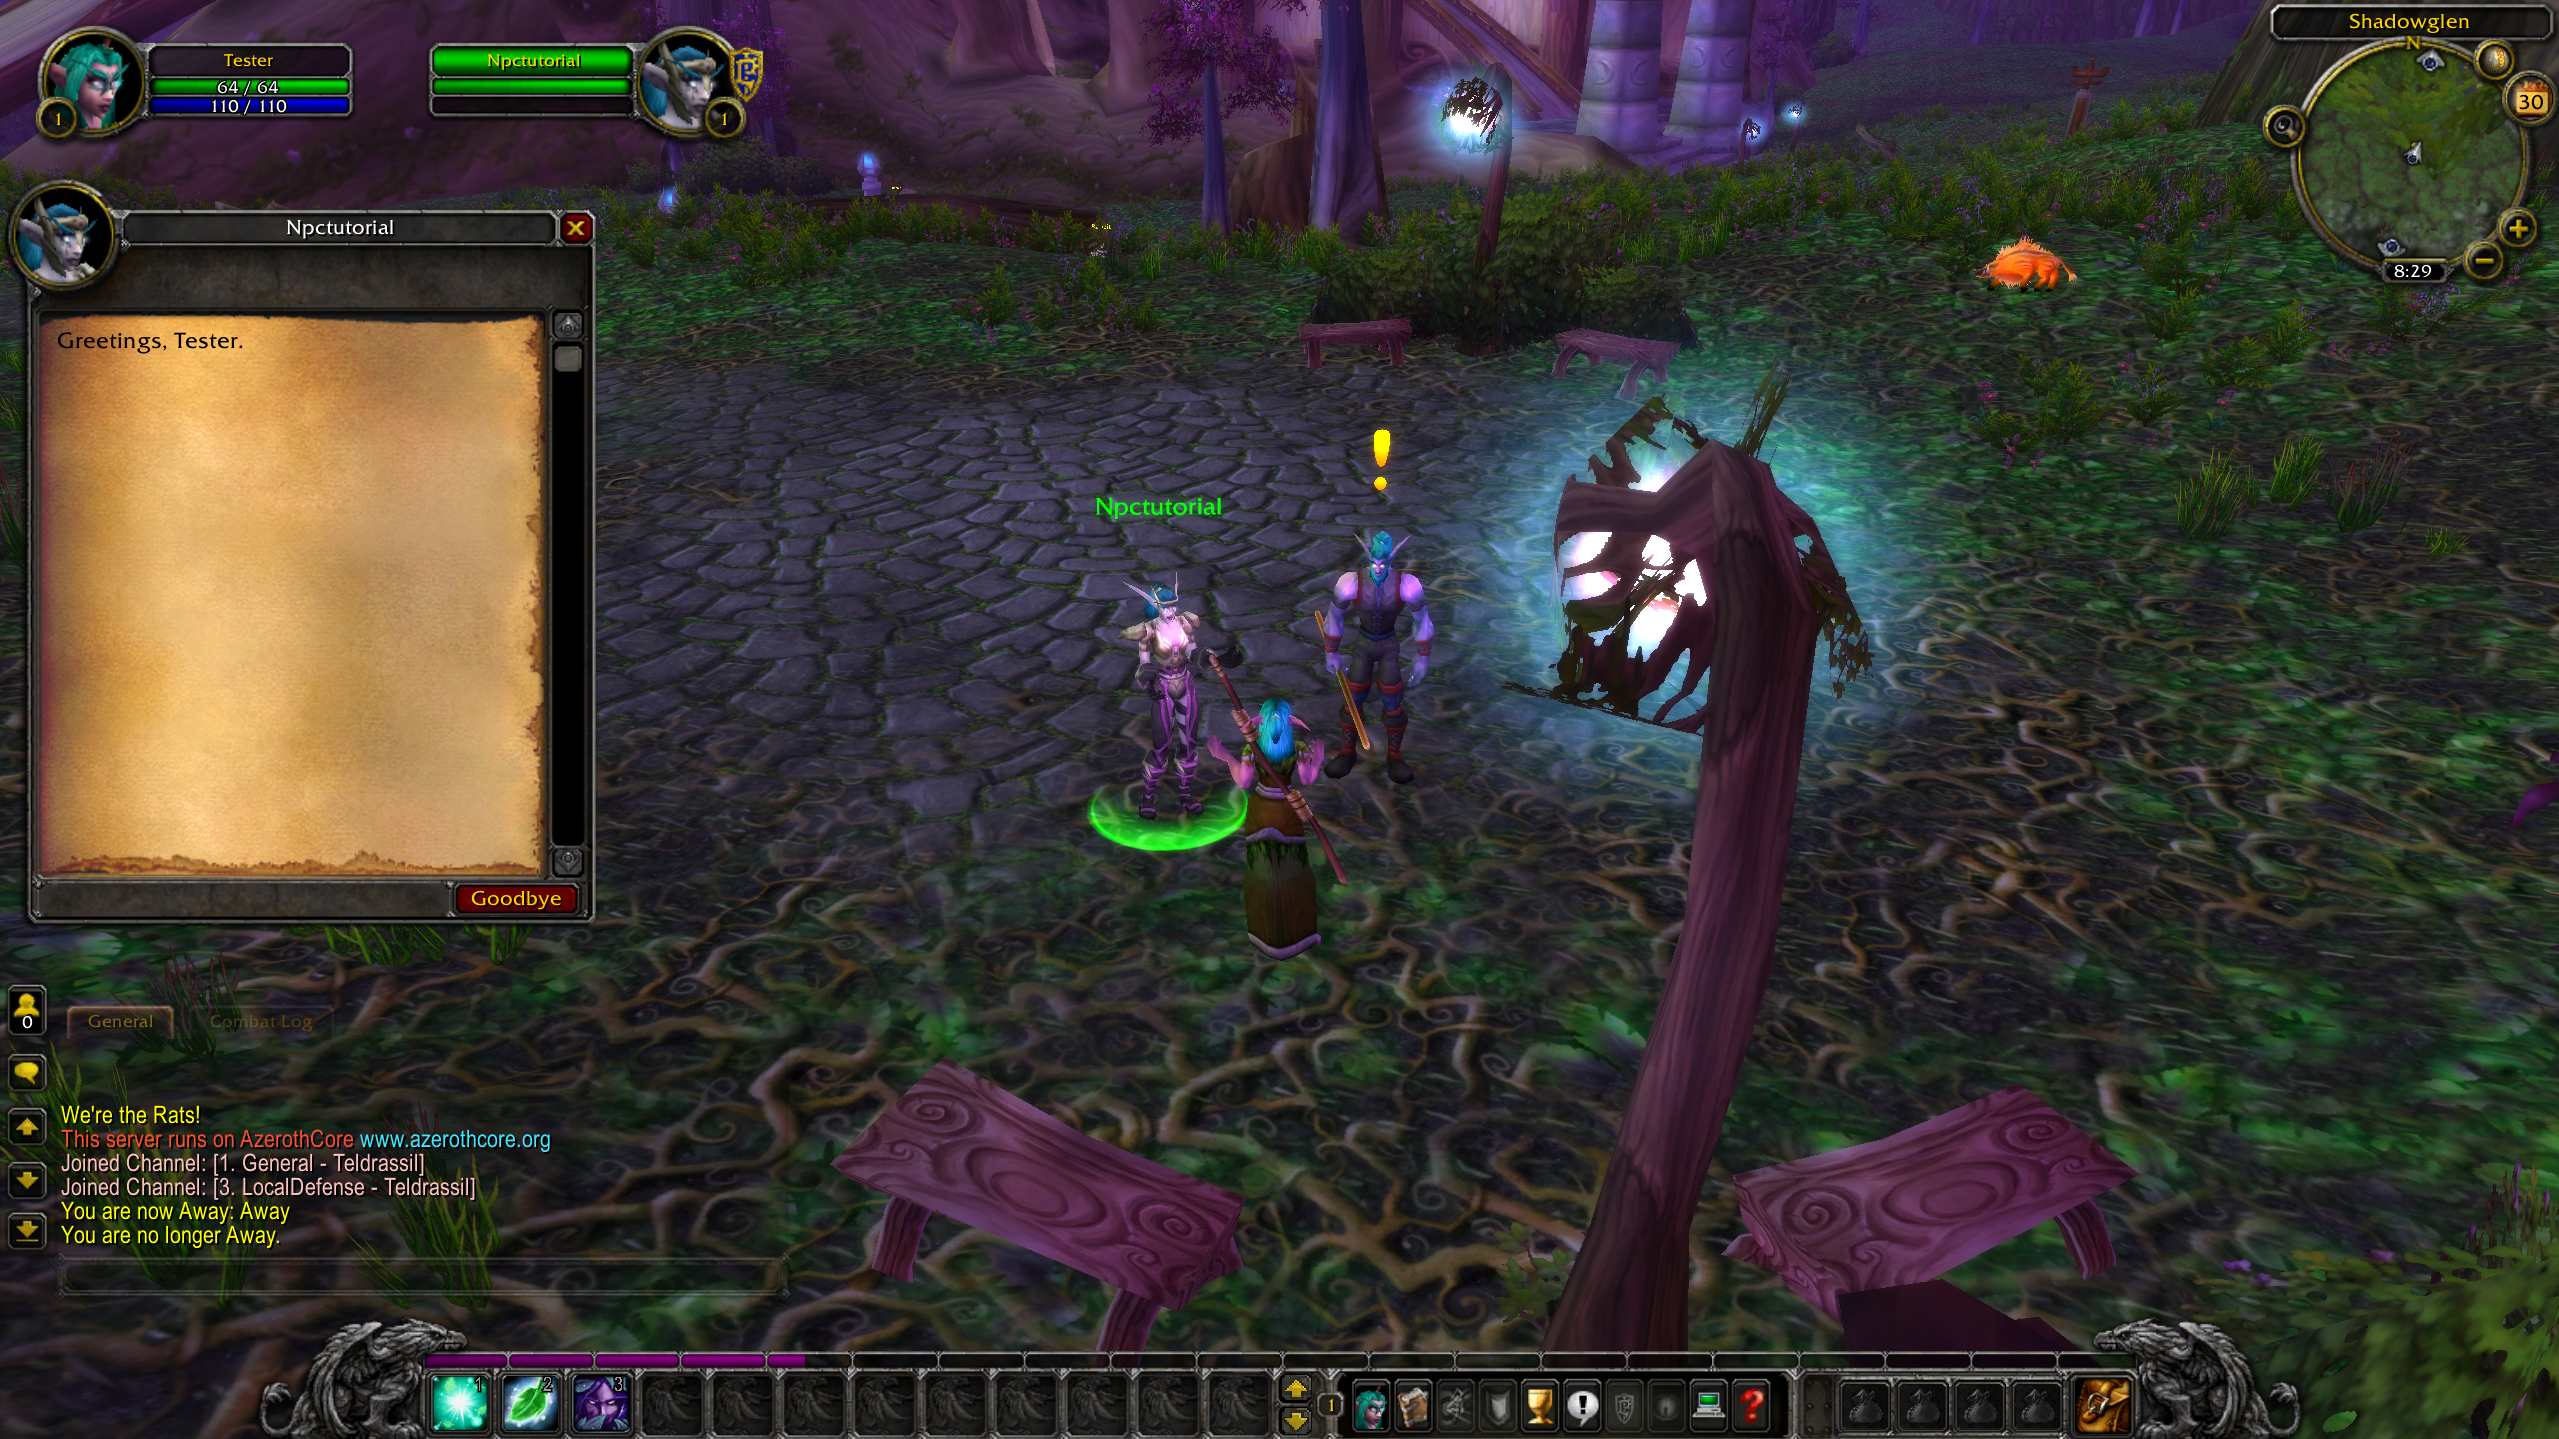
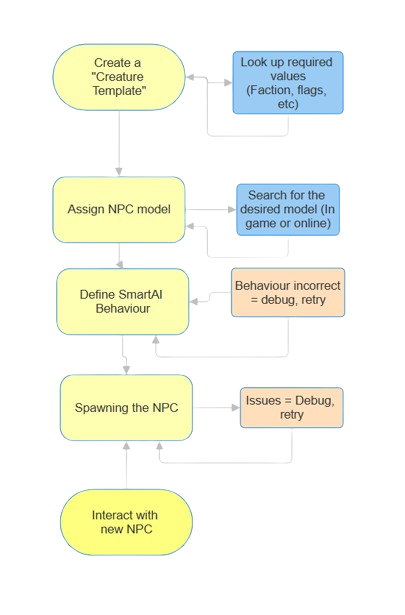
This guide walks through making a basic friendly NPC with Keira3, including assigning values, giving it a model, a gossip interaction, and spawning it in game
Before you begin… (Important!)
Ensure Keira3 is connected to the correct database. If you changed the database’s port after initial setup, you may need to update it in the Keira3 login menu. Keira3 will not tell you if you’re in the wrong database.
Log out of Keira3 and log back in to ensure the connection is active every once and a while. If your database ever disconnects, Keira3 won’t be able to push changes until you do.
Creating a creature template
In this guide, only necessary fields will be used. On the sidebar, there is a cheat sheet for commands and links you can reference.
-
Open the Creature dropdown menu, and click Select Creature
-
Under “Create New” click “Select”. You should be moved to the “Creature Template” tab.
• The default number 9000000 is the unique ID for your creature. This will be how it’s referred to in the database.
-
Under “Base”, enter a name for your NPC
• This will appear in game.
-
Click “IconName”, and scroll down to the chat bubble icon
• This will appear on mouseover.
-
Set both the minlevel and maxlevel to the level you wish your NPC to be
-
Set “Expansion” to Wrath of the Lich King
•This will ensure the NPC is compatible with WotLK data
-
Next to “Faction”, press the “…” icon. In the “faction name” section, type your desired faction,
E.G Darnassus (79), or Orgrimmar (29)
• Faction determines what the NPC is friendly or hostile to. 35 is the ID for a “friendly to all” NPC. 14 is the ID for a “hostile” npc.
-
Open the “npcflag” menu, and enable GOSSIP so the NPC can be interacted with
• Not necessary for non-interactable NPCs
-
Move to “unit flags”. Enable IMMUNE_TO_PC, so no player characters can attack the NPC (Optional)
-
Under “flags_extra”, enable the “civilian” flag, to reduce aggro range
-
In behaviour, under “AIName”, select SmartAI
• This will be used to make the NPC emote when you talk to it. We’ll configure this later.
-
Set “gossip_menu_id” to 140
• This ID links to the basic “greetings” message. Without it, the gossip window would be empty.
-
Scroll back up to the top and press “Execute”
• You should get a success notification in the top right.
Now you have a custom creature template.
Click the “creature template” tab on the left again, and a new array of menus will pop up, dedicated to editing the “creature” you just created.
Giving your NPC a model
Click on the “Template Model” tab.
The important field here is “CreatureDisplayId”. It directly translates to an existing NPC model.
The easiest way to get a specific model’s ID is to find them in game
-
Click on an NPC, and use the command .npc info. This will list everything about them, including displayed.
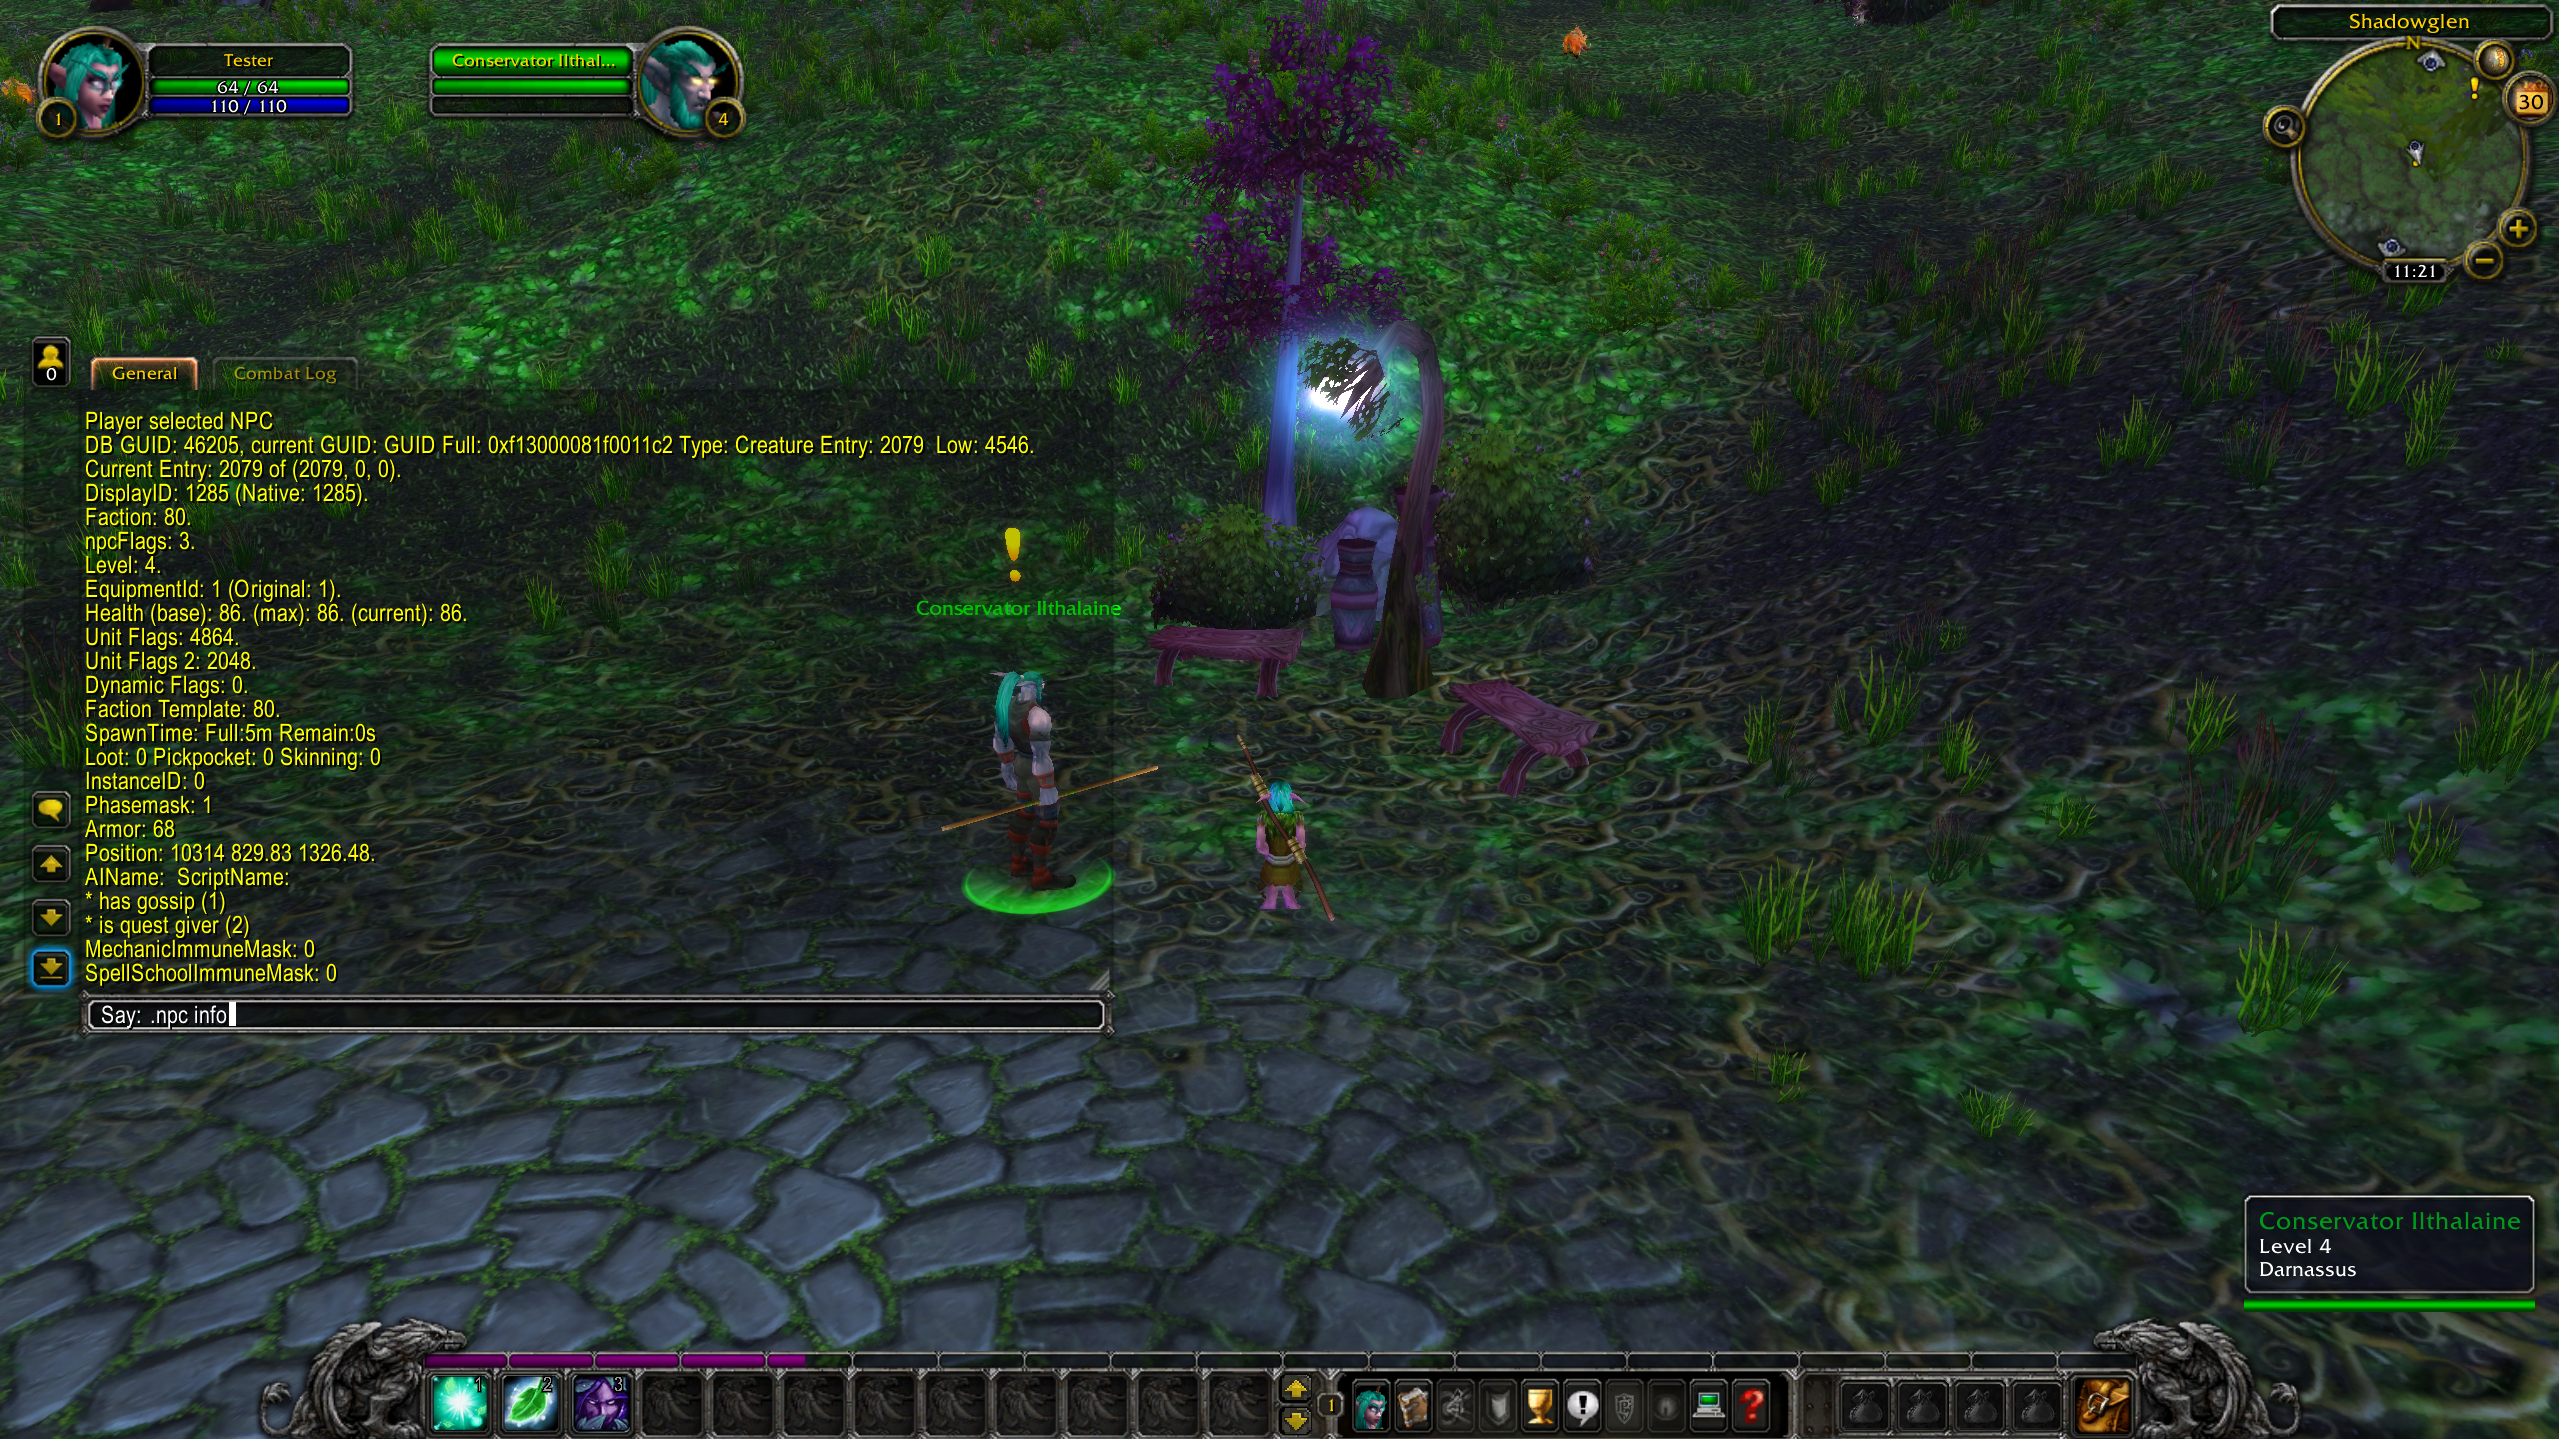
-
Click “Add New Row” to add the displayid to your template
The model should appear in the viewer at the bottom. Click Execute
Using SmartAI to make the NPC use an emote when interacted with
This is simpler than it looks. For our purpose, most fields go unused.
The SmartAI tab is near the bottom of the Creature submenus.
First, click “Add Row”
General tab
-
In “Event”, scroll down to 64 - GOSSIP_HELLO
•This refers to when the “gossip” menu is opened
-
In “Action” select 5 - PLAY_EMOTE
-
In “Target” select 1 - SELF
Action tab
This is where you can select which emote the NPC plays.
There is a list of EmoteIds here. Pick any one you’d like and put it in the Emoteid section.
Click Execute
GUID and spawning your NPC
What is a GUID? Every spawned creature has a unique GUID, that is assigned to each instance of it. A creature won’t spawn if it has the same GUID as another.
At the bottom of all of the Keira3 menus, there is an “unused GUIDs” finder. Click “Search” and copy one.
-
Move to the “Spawn” tab
-
Add new row, paste the GUID
-
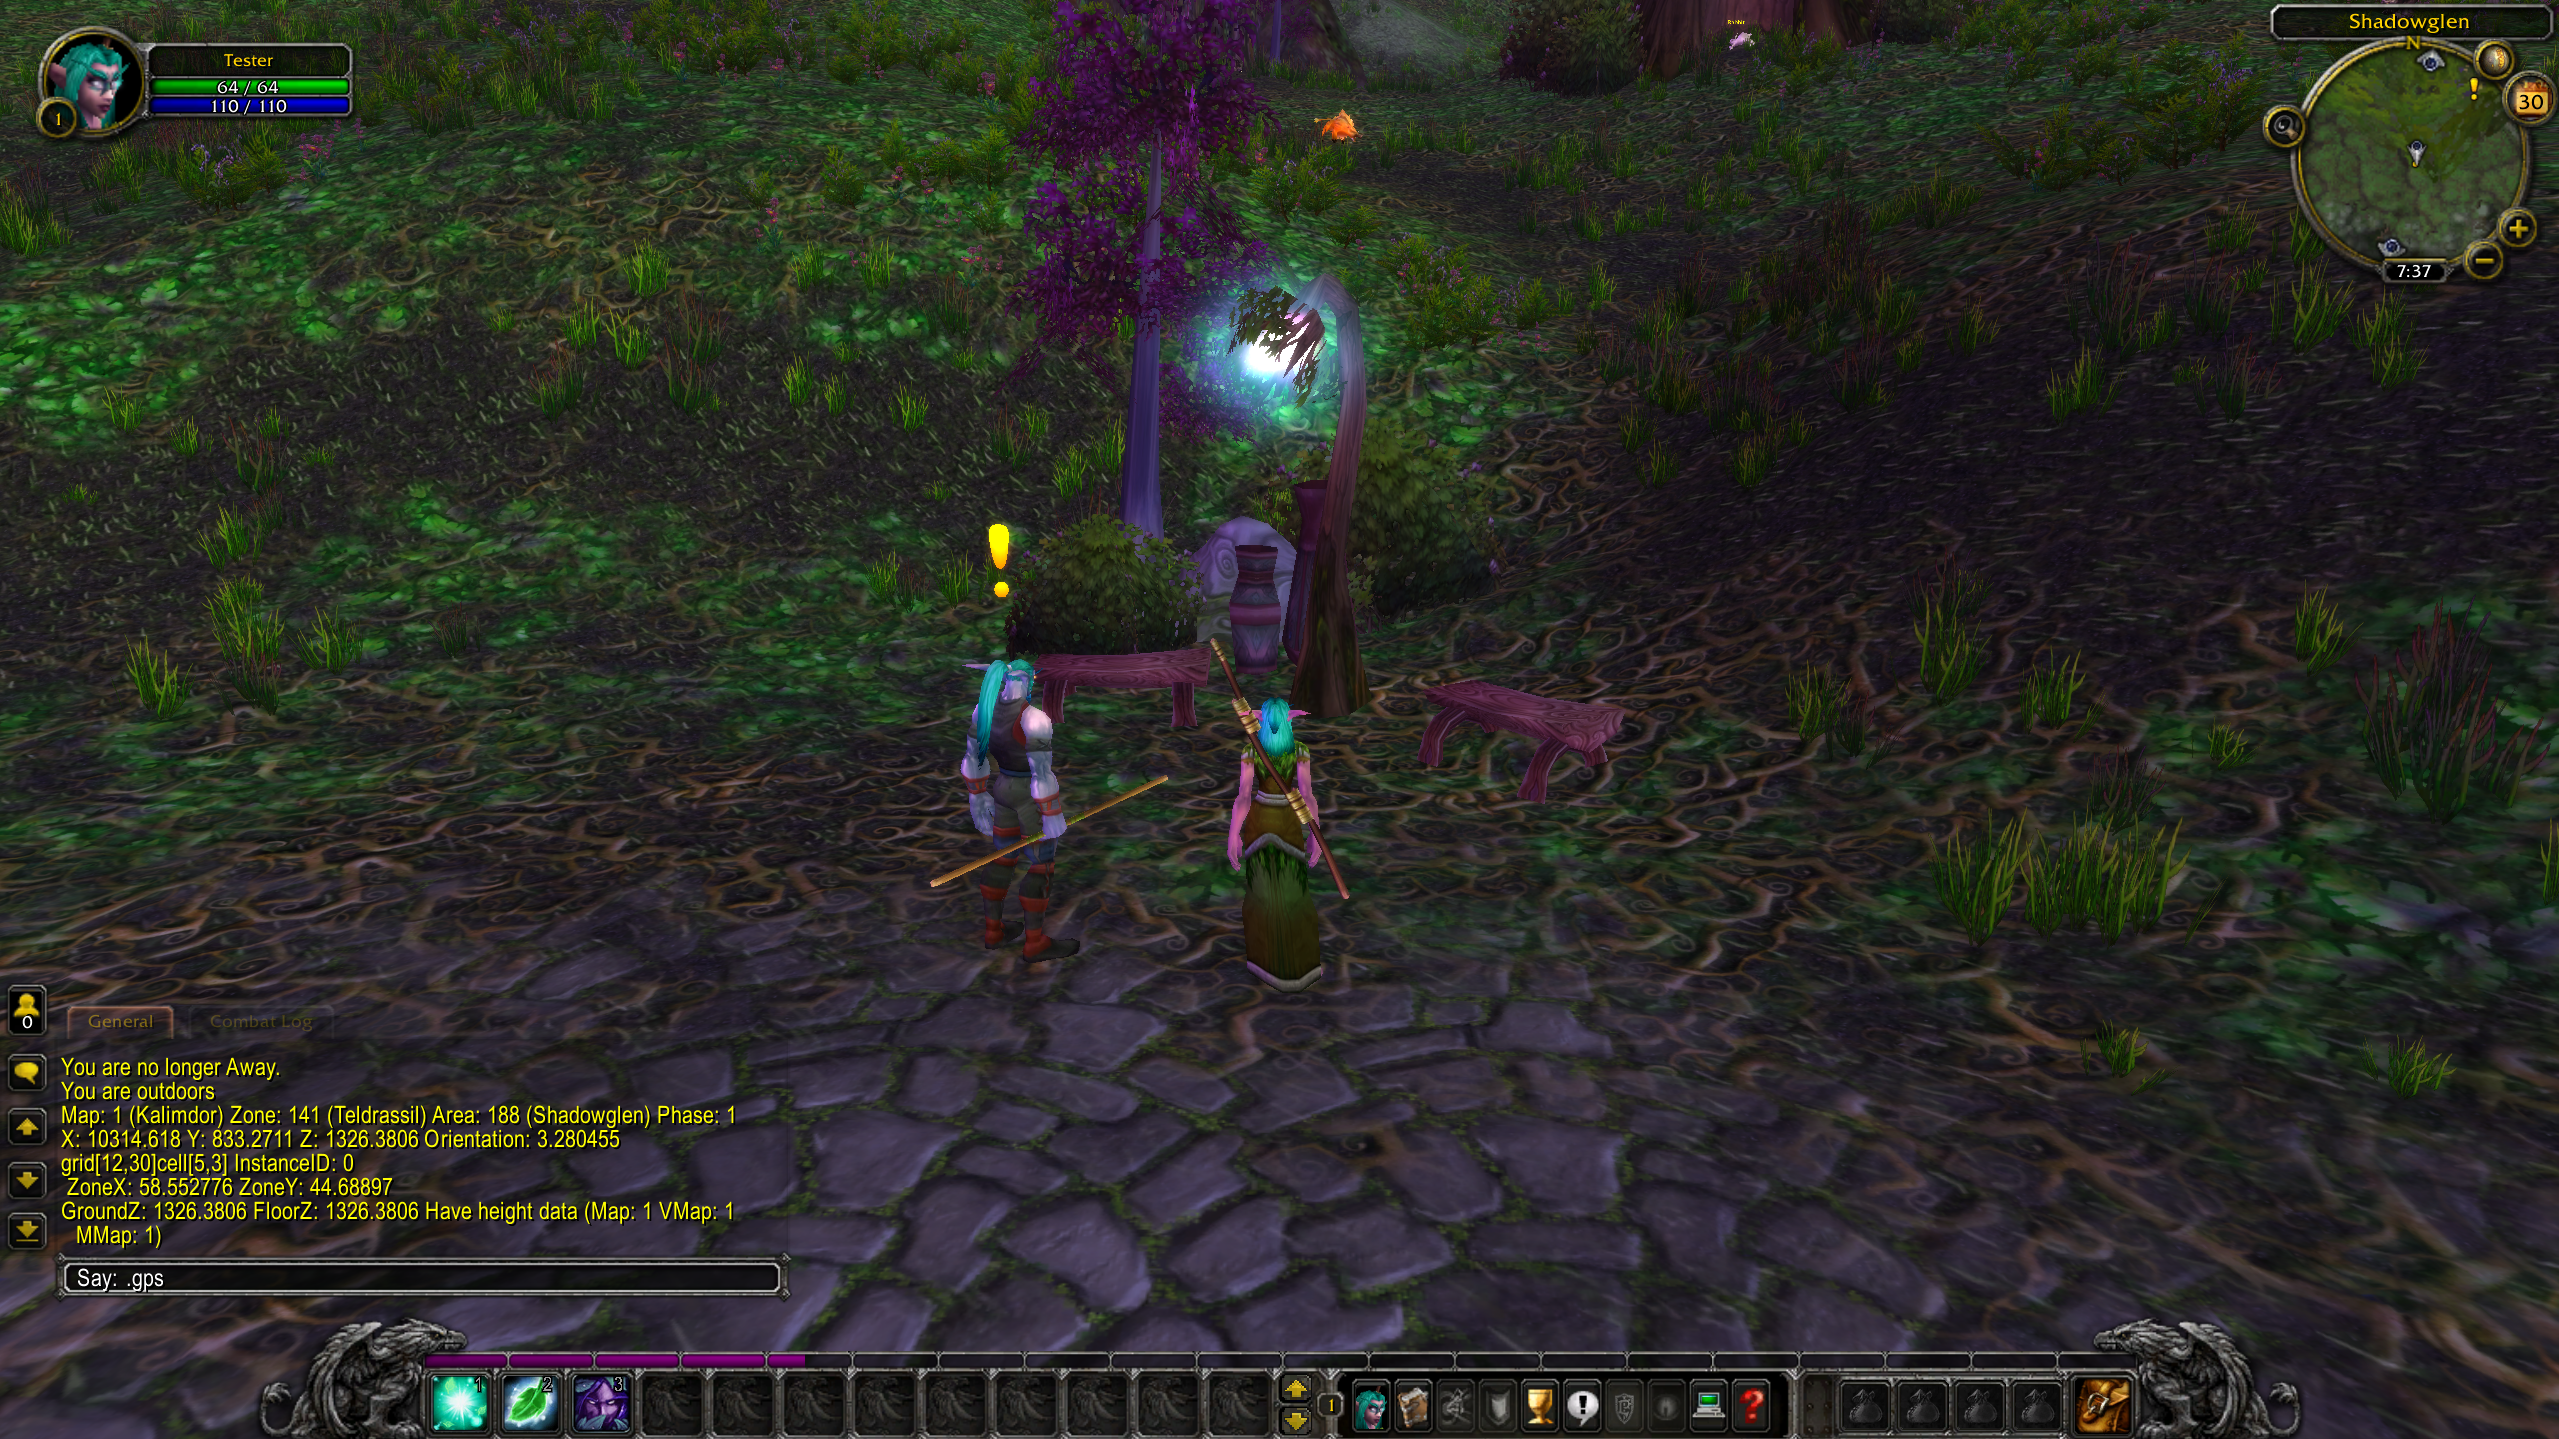
In game, type the .gps command while you’re standing exactly where you want your NPC. This will give you the information for mapid, zoneid, areaid, positions, and orientation.
Notes
- Make sure you don’t have any NPC selected when using the command, as it will give you their position instead of yours
- Use X, Y, and Z, not ZoneX, ZoneY, or Ground Z
- If the yellow is hard to read, above the chatbox you can right click
General > Settings > Other and change the colour of “System Messages”
-
Click Execute
-
Restart your worldserver using .server restart 1
The process is complete, and you now have a new friendly NPC to populate the world